The KOMRIDER tutorial: the key sections and training simulation explained
You've installed KOMRIDER, connected your trainer – and now you're wondering: where do I start? This tutorial guides you through the app's key training sections. Then we'll go step by step through your first ride in the 3D training simulation.
Trainer not connected yet? Have a look at our guide Setting up your smart trainer properly first.
The home page: your cockpit
After logging in you land on the home page. It's the hub for your key training sections:
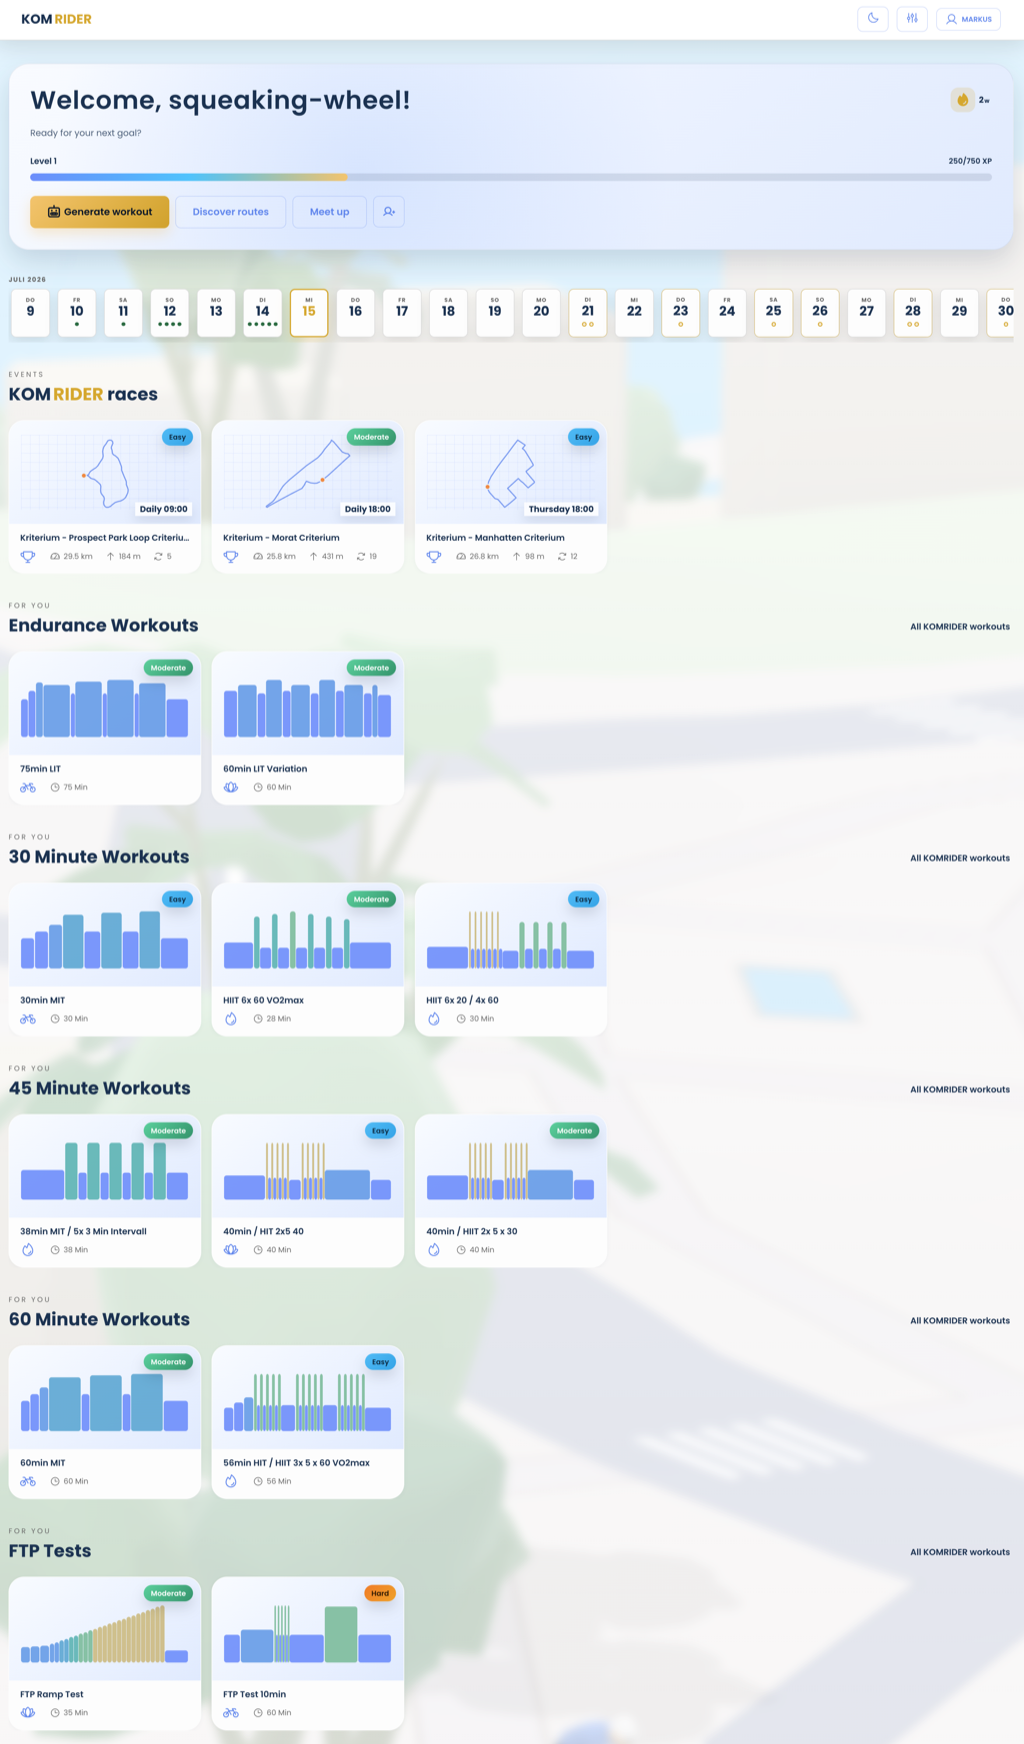
- Discover routes and Your routes – the route catalog and your own courses.
- Your segments and Your simulations – your saved route sections and prepared training sessions.
- Training overview and Latest sessions – your statistics and completed rides.
The Training Setup in the top bar takes you to your personal values. Your weight is used for realistic riding and gradient simulation. Your FTP lets KOMRIDER calculate personal power zones and suitable watt targets for your workouts.
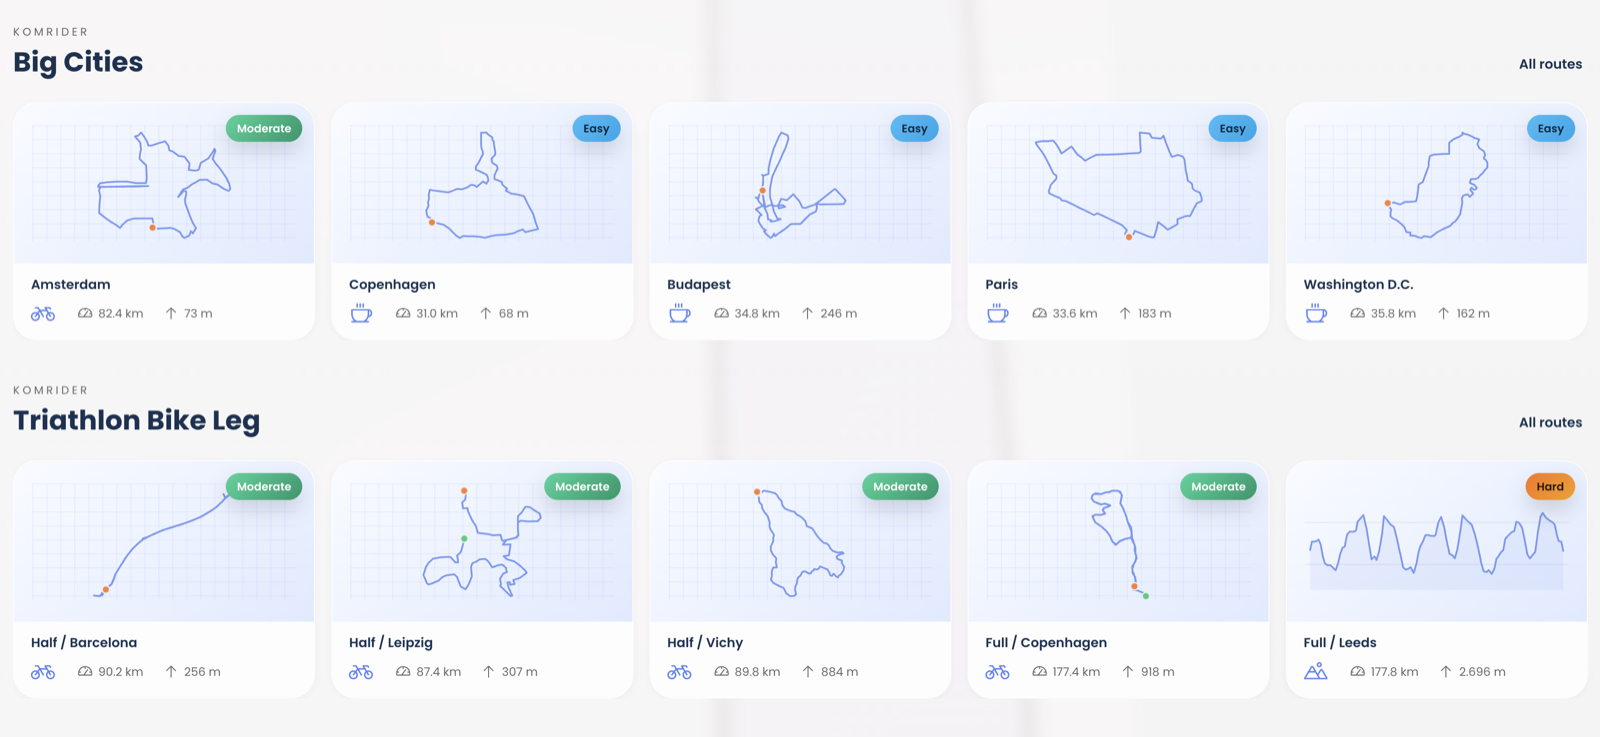
Routes: find courses and ride them
In the Routes section you pick a course from the table and see its elevation profile and map on the right. With the simulation type Route you ride the complete course from start to finish.
By the way: on every route you can also save individual sections as segments and build complete, repeatable training sessions (simulations) from them. We'll dedicate a separate blog post to that topic soon.
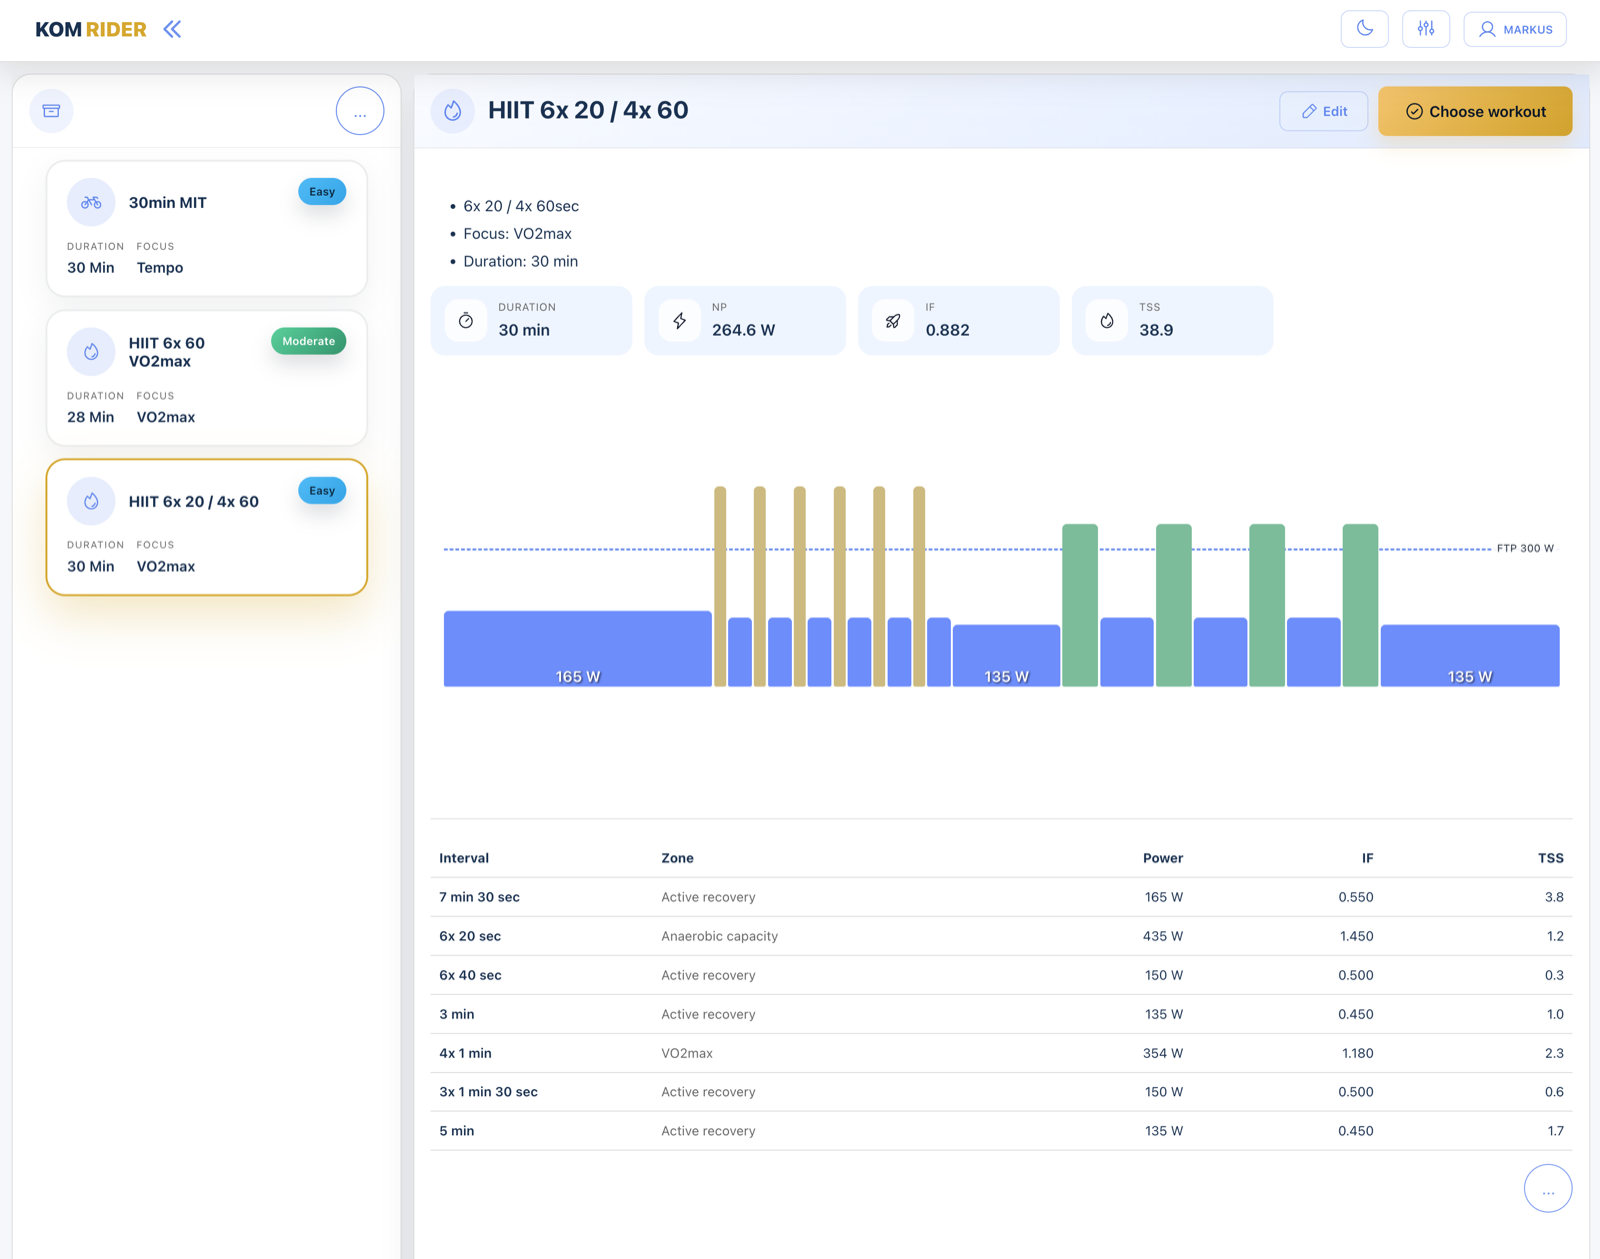
Workouts: structured training with watt targets
The Workouts section holds structured sessions with fixed watt targets. Here the workout controls your trainer's resistance – not the elevation profile of the course. You can still combine a workout with a route (Start workout with route) and ride through the 3D world while your trainer follows the watt targets.
The training simulation: your ride in 3D
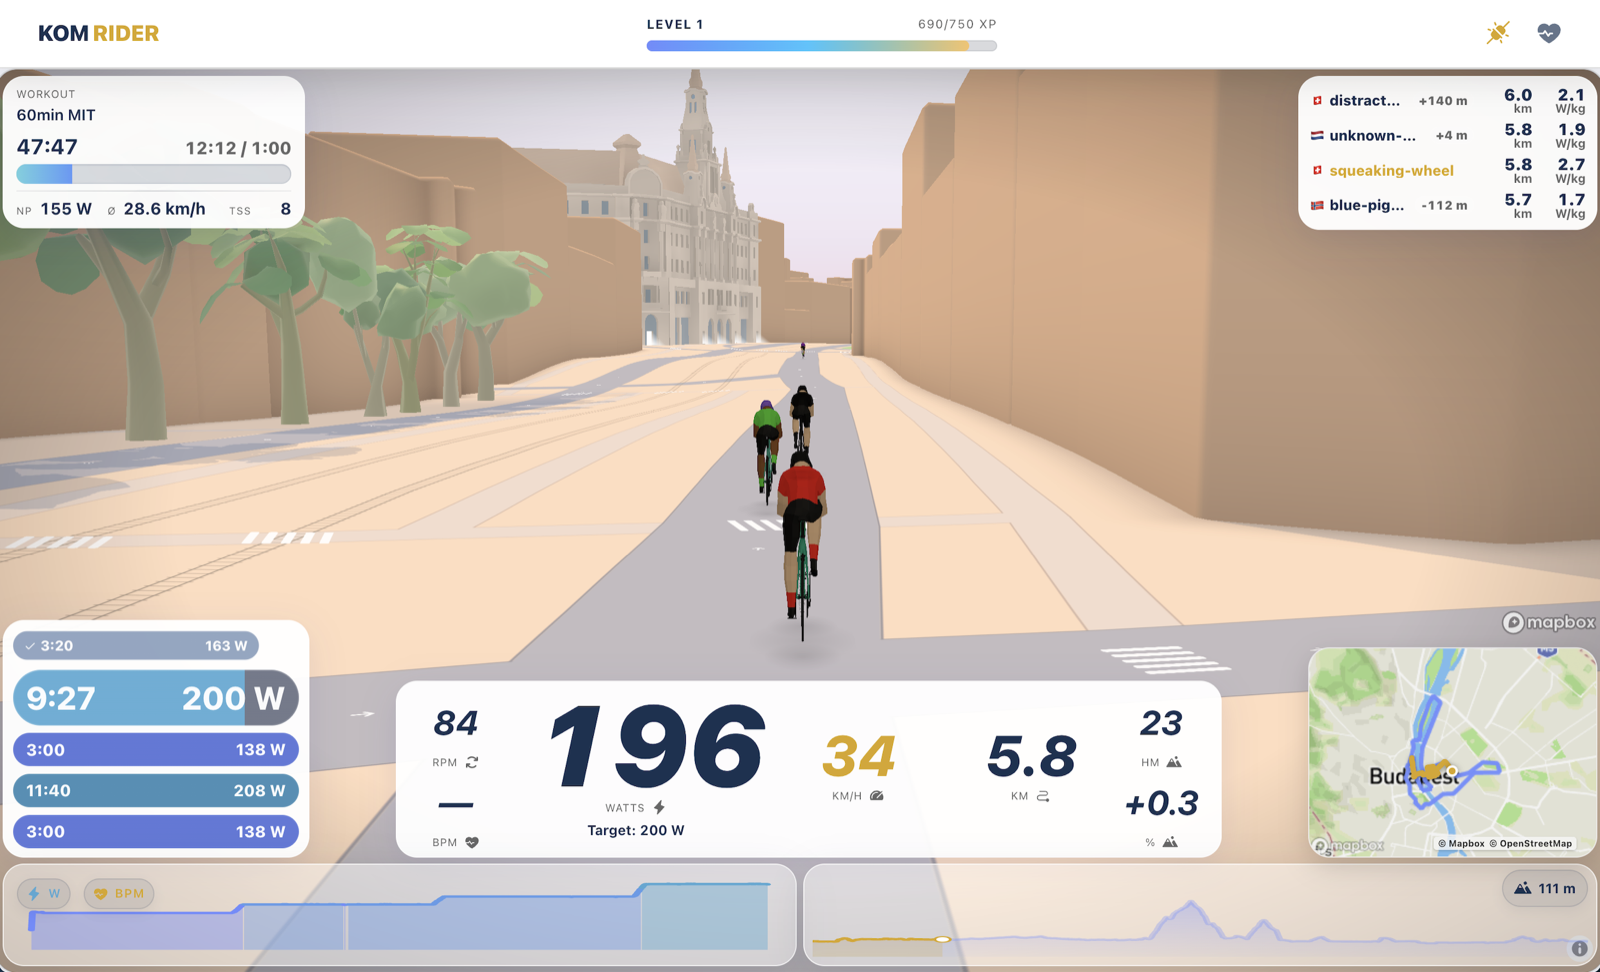
Whether it's a route or a workout – in the end you arrive in the 3D training view. The HUD at the bottom always shows which mode you're in – for example Workout or Free ride.
Getting going
After clicking Start ride, KOMRIDER loads the course and waits for your trainer's data: "Loading route…", "Waiting for telemetry…" and finally "Ready – waiting for movement…". All that's left is to start pedaling – as soon as the trainer reports power, the ride begins and the display switches to Live.
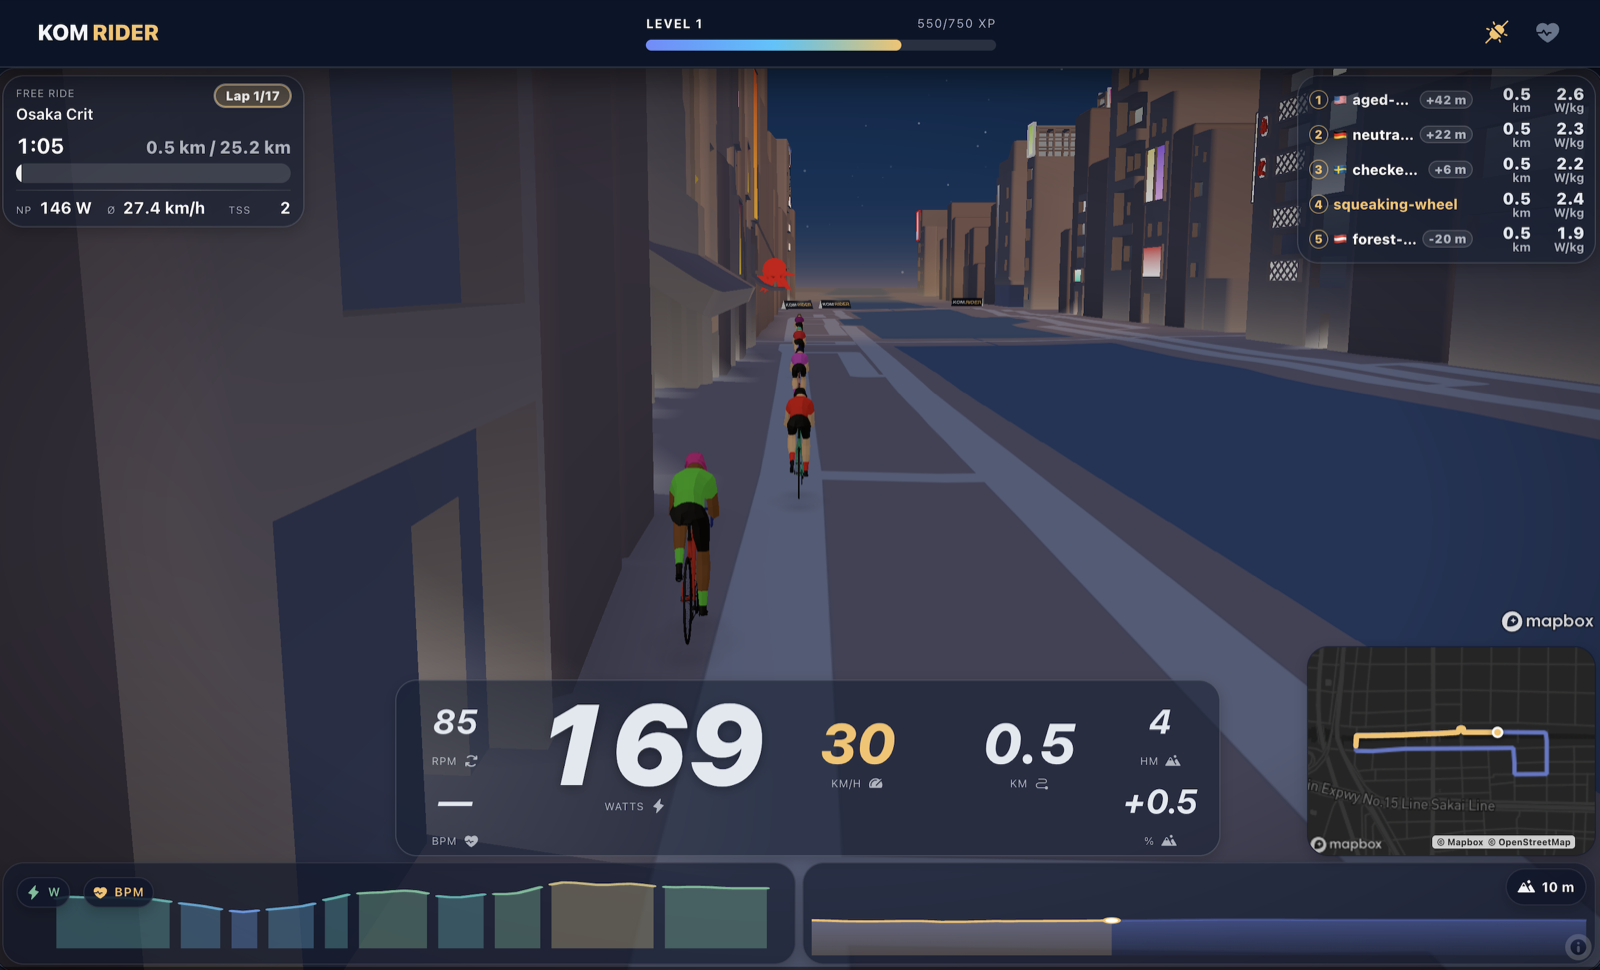
What you see during the ride
- Your live data: power, cadence and heart rate, color-coded by your power zones – from "Active recovery" to "Neuromuscular power". In workouts, the target shows which wattage is expected right now.
- Mini map and course profile: you always see where you are on the course, which lap you're on and how far it is to the finish.
- Scene and photo: the HUD buttons let you toggle the time of day or take a screenshot of your ride.
As soon as you're riding, the control bar hides automatically so nothing blocks your view. Press the Ctrl key to bring it back at any time – that's where you pause, resume or end the ride via Pause, Resume and Stop. During training the top bar also shows two icons with the connection status of your trainer and heart-rate sensor – clicking them re-checks the connection.
After the ride
Once you cross the finish line, KOMRIDER wraps up your session:
- Save activity? – give your ride a title and store it in your history (including screenshots if you like).
- Update FTP? – if you rode strong, KOMRIDER suggests a new FTP value based on your best 10 minutes.
- How was the session? – rate your effort on cycling's most honest scale: from "Why Did I Start This?" to "Legs of Glory".
In a nutshell
- Home page → overview and entry point to the key training sections.
- Routes → pick a course and ride it in full.
- Workouts → train to structured watt targets, with a route if you like.
- Training simulation → start pedaling, ride, save – and beat your own record next time.
If anything stays unclear or you get stuck somewhere in the app: tell us! Tutorials like this one exist precisely because of that kind of feedback.
See you on the road!